

Staggs Plumbing is Plano’s trusted water heater specialist that helps homeowners eliminate sediment buildup, reduce energy bills, and extend tank life through expert flushing services and DIY guidance.
If your water heater is making popping or rumbling sounds during heat-up, you’re experiencing North Texas’s #1 water heater problem: hard water sediment buildup. Our region’s mineral-rich water accelerates scale formation inside tanks, reducing efficiency and causing those concerning noises. Whether you’re a confident DIYer or prefer professional service, this guide provides everything you need to know about flushing your 50-gallon tank water heater.
Quick answers for North Texas homeowners:
- Flush frequency: Every 6-12 months due to hard water
- DIY time: 45-90 minutes first time, 30-45 minutes with experience
- Emergency response: Same-day service available
- Service area: Plano, Dallas, Fort Worth, Richardson, Allen, McKinney, Frisco
Signs You Need a Water Heater Flush (Checklist)
Check these indicators to determine if sediment buildup is affecting your tank:
- Popping or rumbling sounds during heating cycles – caused by steam bubbles fighting through sediment layers
- Hot water runs lukewarm faster – shorter hot showers before temperature drops
- Cloudy or rusty initial hot water that clears after a few seconds of running
- Reduced hot water pressure while cold taps maintain normal flow
- Higher energy bills without increased usage
- Tank is 12+ months old without previous flushing
Tools & Preparation (5 minutes)
Required Equipment:
- Garden hose (25-50 feet recommended)
- Work gloves and safety glasses
- Bucket for initial discharge testing
- Adjustable pliers or channel locks
- Flashlight for inspection
- Towels for minor spills
SAFETY FIRST: Water temperatures can exceed 140°F. Always wear protective equipment and allow 2-3 hours of cooling time if possible. Keep children and pets away from work area.
Step 1: Make Your Water Heater Safe (2 minutes)
This critical first step prevents the water heater from firing during drainage, which could cause severe damage to gas burners or instantly destroy electric heating elements. Many DIYers skip this step and face expensive repairs.
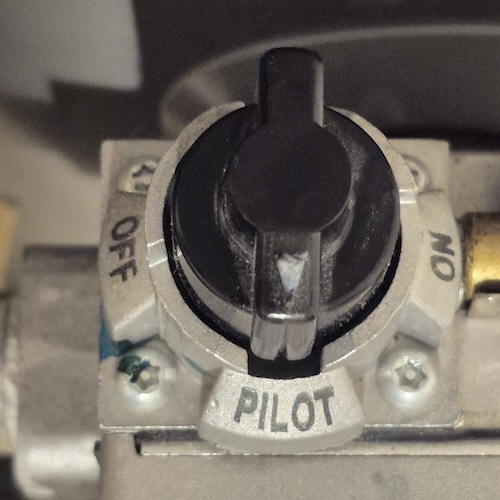
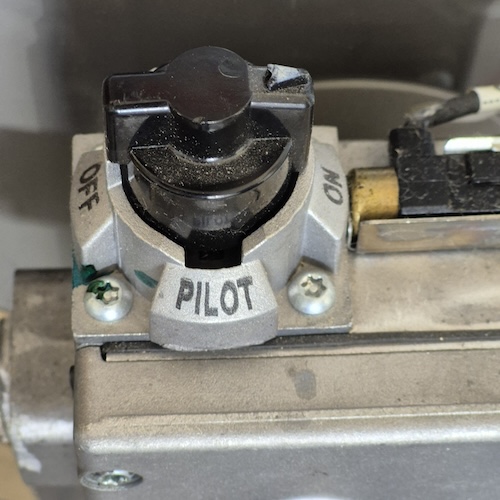
For Gas Water Heaters:
Set the control knob to “Pilot” or “Vacation” mode. This keeps the pilot lit but prevents the main burner from firing during the flush. Finding the right setting can be tricky on older models where labels have worn off.
For Electric Water Heaters:
Turn OFF the breaker at your electrical panel. Label it with tape to prevent accidental restoration. Electric elements will burn out in seconds if powered without water – a $200+ mistake.
DIY Risks:
- Gas valve confusion can lead to pilot light extinction (relighting requires experience)
- Wrong breaker turned off = potential element damage
- Forgetting this step entirely = catastrophic heater damage
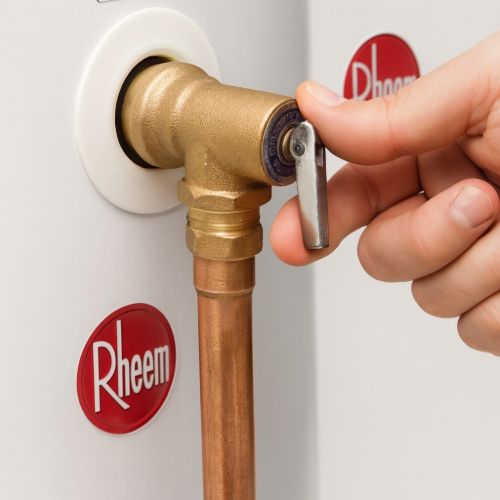
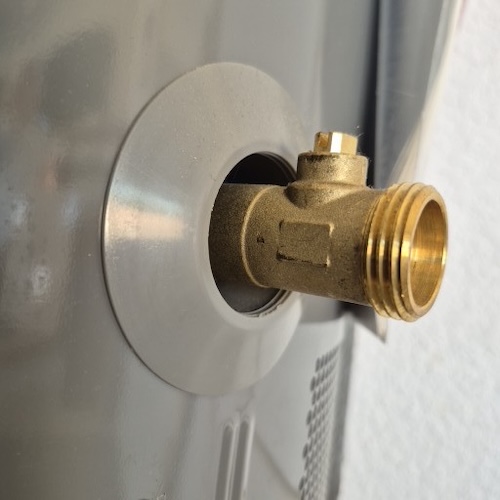
Step 2: Shut Off Cold Water Supply (2 minutes)
Stopping incoming water flow is essential before draining. Skip this step and you’ll be fighting a continuous stream of fresh water mixing with the sediment you’re trying to remove.
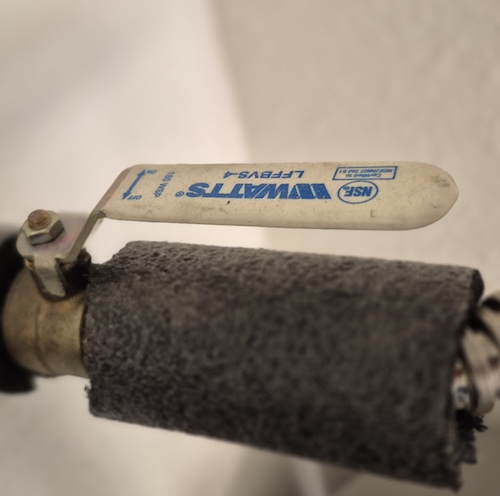
Close the cold-inlet ball valve by turning the handle perpendicular to the pipe. When properly closed, the handle should be at a 90-degree angle to the pipe direction. This stops new water from entering during drainage.
Many older homes have gate valves instead of ball valves. These round-handled valves require multiple turns to close and may not fully seal after years of mineral buildup. If your gate valve won’t close completely, you’ll need professional valve replacement before attempting a flush.
DIY Risks:
- Old gate valves may break when forced = flooding emergency
- Mineral buildup prevents complete closure = ineffective flush
- Wrong valve closed = no hot water to house or worse
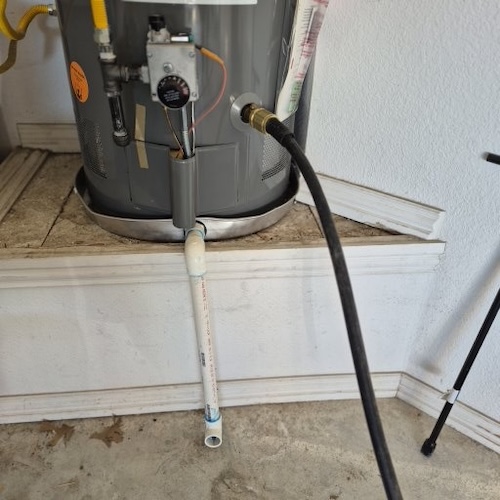
Step 3: Connect Hose & Establish Drainage (3 minutes)
Thread your garden hose onto the drain valve at the tank’s base, ensuring a tight connection. Hand-tighten first, then give an extra quarter-turn with pliers. Over-tightening can crack plastic valves.
Route the hose to a lower elevation drain, driveway, or yard area that can handle hot water discharge. The hose must run downhill continuously – any dips, rises, or loops will create air pockets that prevent proper drainage. Stretch the hose completely straight if possible.
Common DIY Mistakes:
- Cross-threading the hose connection = leaks and water damage
- Using a kinked or clogged hose = incomplete drainage
- Draining near foundation = potential structural issues
- Not checking hose temperature rating = melted hose disasters
- Hose not secured at discharge point = dangerous whipping action
Step 4: Break the Vacuum & Begin Draining (5-10 minutes)
Without breaking the vacuum, your tank won’t drain properly – like trying to pour from a bottle with only one hole. This physics principle frustrates many DIYers who wonder why water barely trickles out.
Open the hot water faucet farthest from your water heater (typically an upstairs bathroom). This admits air into the system, breaking the vacuum and enabling continuous gravity drainage.
Open the drain valve slowly using pliers if needed. Initial flow may surge, sputter, or start slowly due to sediment blockage. Many DIYers panic when nothing happens initially – patience is crucial here.
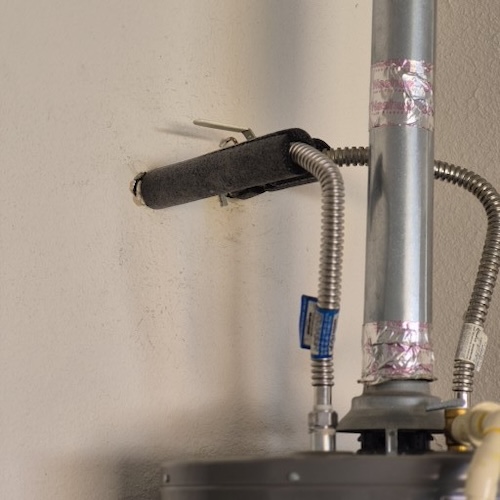
If drainage seems blocked, briefly lift the T&P (temperature & pressure relief) valve lever for 2-3 seconds to introduce additional air. This valve may not reseat properly afterward, creating a permanent drip.
DIY Hazards:
- Scalding water can surge unexpectedly when blockages clear
- T&P valve may fail to reseat = continuous dripping ($150+ repair)
- Plastic drain valves often break when turned = emergency situation
- Sediment can completely block flow, requiring professional equipment
Step 5: Pulse-Flush for Maximum Sediment Removal (10-15 minutes)
This advanced technique separates amateur flushes from professional-grade service. Simple draining removes only loose sediment, leaving compacted deposits that continue causing problems.
The pulse-flush technique: While keeping the drain valve open, rapidly open and close the cold-inlet valve in 5-10 second bursts. This creates turbulent water jets that agitate and dislodge stubborn sediment deposits.
- Perform 3-5 pulse cycles
- Watch discharge color at hose end
- Stop condition: Continue until discharge water runs clear
- Caution: Each pulse sends 140°F+ water through – maintain safe distance
DIY Dangers:
- Scalding water jets can cause severe burns
- Sudden pressure can blow off poorly connected hoses
- Old valves may fail under repeated cycling = flooding
- Excessive pulsing can disturb pipe connections = leaks
Step 6: Close Drain & Disconnect Hose (2 minutes)
This seemingly simple step causes more callbacks than any other. Improper closure leads to continuous dripping, water damage, and emergency plumber visits.
Approx. 20-40 minutes later, the tank will have finished draining. Now close the drain valve completely. This requires more force than expected, especially with plastic valves. Remove the garden hose carefully – residual hot water may drain out.
If the plastic drain valve seeps afterward (very common), thread on a brass hose cap as a temporary seal. This $3 part prevents water damage until professional valve replacement.
Common Failures:
- Plastic valves crack when overtightened = immediate replacement needed
- Sediment prevents complete closure = continuous dripping
- Valve handles break off in your hand = emergency situation
- Cross-threading the cap = won’t seal properly
Step 7: Refill Your Tank (10-15 minutes)
Proper refilling ensures complete air removal and prevents damage when reheating begins. Trapped air pockets cause alarming noises and can damage heating elements.
Fully open the cold-inlet valve to begin refilling. You’ll hear water rushing into the tank – this is normal. Keep that distant hot faucet open throughout the entire refill process.
The open faucet will sputter, spit, and discharge air violently as the tank fills. This can be alarming but is completely normal. Have towels ready at the open faucets to catch water splashes.
Critical verification: Wait until sputtering completely stops and a steady, splash-free stream flows from the hot faucet. This confirms your tank is completely full and air-free. Rushing this step is the #1 cause of element failure.
DIY Mistakes That Cost:
- Closing faucet too early = air pockets remain
- Not waiting for steady flow = elements burn out ($200+)
- Multiple faucets open = can’t verify proper fill
- Impatience leads to premature power restoration
Step 8: Restore Power or Gas (2 minutes)
This final heating step must occur only after absolute confirmation of a full tank. Premature power restoration is the most expensive DIY mistake, often totaling $500+ in repairs.
For Gas Water Heaters:
Turn control from “Pilot” to “On” position. You should hear the main burner ignite within 30 seconds. If the pilot went out during service, relighting requires following specific manufacturer procedures – each brand differs.
For Electric Water Heaters:
Return to the breaker panel and switch the water heater breaker back ON. Elements begin heating immediately – there’s no warning if the tank isn’t full.
CRITICAL WARNING: NEVER restore power to an electric water heater before confirming steady hot water flow. Dry-firing destroys elements in under 30 seconds. This is a $200-400 mistake that happens to 1 in 5 DIYers.
Costly DIY Errors:
- Elements powered dry = instant burnout
- Pilot won’t relight = requires professional service
- Gas smell after restoration = immediate evacuation needed
- Breaker trips repeatedly = electrical damage occurred
Step 9: Final System Check (5 minutes + 30-minute recheck)
Post-flush inspection catches problems before they become emergencies. Many DIYers skip this crucial step and wake up to flooded garages or failed water heaters.
Inspect all connections for leaks:
- Drain valve area (most common leak point)
- Cold inlet connection
- T&P valve discharge pipe
- Tank bottom for any pooling
Normal reheat time: 20-40 minutes depending on tank size and BTU rating. Return after 30-60 minutes of heating to verify no new leaks have developed. Thermal expansion during heating often reveals problems.
Successful flushing typically reduces or eliminates popping/rumbling sounds immediately. If noises persist, additional issues exist requiring professional diagnosis.
Hidden Problems DIYers Miss:
- Hairline cracks that open under pressure
- Weakened fittings from corrosion
- Anode rod deterioration (requires tank opening)
- Internal tank damage from sediment
Gas vs. Electric Water Heaters – Key Differences
| Aspect | Gas Water Heater | Electric Water Heater |
|---|---|---|
| Safe Mode | Set to “Pilot” or “Vacation” | Turn breaker OFF completely |
| Restoration | Turn knob from “Pilot” to “On” | Flip breaker back ON |
| Critical Risk | Gas leak if connections disturbed | Element burnout if powered dry |
| Reheat Time | 20-30 minutes typical | 30-45 minutes typical |
| Verification | Listen for burner ignition | Check for normal amp draw |
When to Call Staggs Plumbing Professionals
DIY Not Recommended If:
- Drain valve is corroded shut or actively leaking
- Tank has never been flushed in 5+ years
- You smell gas anywhere near the unit
- T&P valve won’t stop dripping after testing
- Water heater is 10+ years old (inspection recommended)
- You’re uncomfortable with any safety aspect
- Initial discharge shows heavy rust (not just sediment)
Professional Service Advantages:
- Complete 21-point inspection included
- Anode rod check (extends tank life 3-5 years)
- Professional-grade flush equipment
- Valve replacement if needed
- Written condition report
- Warranty on service
Frequently Asked Questions
Q: How often should I flush my water heater in North Texas?
A: Due to our hard water containing 7-10 grains of minerals per gallon, annual flushing (every 6-12 months) prevents excessive buildup. If you hear popping sounds, don’t wait for a schedule – flush immediately or call for service.
Q: Is pulse-flushing really necessary?
A: While simple draining removes loose sediment, pulse-flushing creates turbulent jets that break up compacted deposits. The cold water bursts agitate sediment layers much more effectively. Stop when discharge water runs clear – typically after 3-5 cycles.
Q: My plastic drain valve is leaking after flushing. Now what?
A: This is common with original plastic valves. As a temporary fix, thread on a brass hose cap from any hardware store. Schedule professional valve replacement soon – we install brass ball valves that last decades and make future flushing easier.
Q: Will flushing eliminate all water heater noises?
A: Flushing typically eliminates popping and rumbling caused by sediment. However, high-pitched whines might indicate other issues like a deteriorating anode rod or loose heating element. If unusual noises persist after flushing, professional diagnostic service is recommended.
Q: Can I flush a tankless water heater the same way?
A: No – tankless units require descaling with vinegar or professional chemicals, not traditional flushing. This is a completely different process requiring a recirculation pump setup.
Q: Should I also replace my anode rod during flushing?
A: Anode rod inspection is valuable during a flush since the tank is already partially drained. In North Texas water, anode rods typically last 3-5 years. If yours is heavily corroded (less than 1/2″ thick), replacement will significantly extend tank life.
Professional Water Heater Service in Plano & DFW
Need Help Today?
CALL NOW: 682-284-0966
24/7 Emergency Service • 45-Minute Response
Standard Service Options
- Professional Power Flush (includes inspection)
- Anode Rod Replacement
- Drain Valve Upgrade
- Complete Tune-Up Package (flush + anode + inspection + valve check)
Service Coverage
All of North Texas including Plano, Dallas, Fort Worth, Richardson, Allen, McKinney, Frisco, Garland, Irving, Carrollton, Lewisville, Mesquite, Denton, and surrounding communities.
The Staggs Plumbing Advantage
- Licensed Master Plumbers (MASTER PLUMBER LICENSE M-17697)
- $2 Million Insurance Coverage
- BBB A+ Rated
- Over 10,000 Water Heaters Serviced
- Upfront Pricing Before Work Begins
- Same-Day Service Available
- 100% Satisfaction Guarantee
Take Action Now
Don’t let sediment destroy your water heater. Whether you tackle it yourself using our guide or prefer our expert service, regular flushing protects your investment and ensures reliable hot water for your family.
If you enjoyed this article, check out these other articles regarding Water Heater:
Choosing the Right Water Heater for Your Home: A Comprehensive Guide
How Often Should You Flush Your Water Heater?